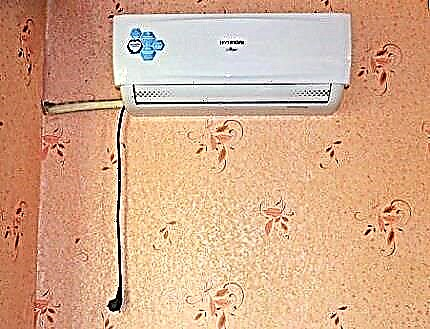
In order not to languish from the heat in the summer, but to warm up the rooms during the cold season, you planned to purchase an inverter or conventional split system. And you want to install and connect it yourself, in order to save on professional installation (which is not always the case).
Our publication has 2 tasks: to tell how to install the air conditioner with your own hands and analyze how economically feasible it is. Let’s go in the reverse order and first compare the costs for manual and custom installation, and for this we list ...
Assembly tools and materials
We will not disclose the principle of operation of the split system here; it is described in detail on another page of our resource. For a common understanding: between two heat exchangers - external and internal, refrigerant (freon) moves in pipelines in liquid and gaseous state, transferring thermal energy to the street or to the house depending on the selected mode (air conditioning or heating).

The installer's task is to place and fix the blocks in accordance with all the rules, combine them with pipes and connect to the mains, and at the end start and check the units.
It also makes no sense to list every screwdriver or key, a similar tool for the master craftsman should be at hand. We will only consider equipment and devices, without which it is impossible to mount and start the air conditioner itself:
- punch with a diamond drill or core drill (depending on the material of the walls) with a diameter of not less than 45 mm;
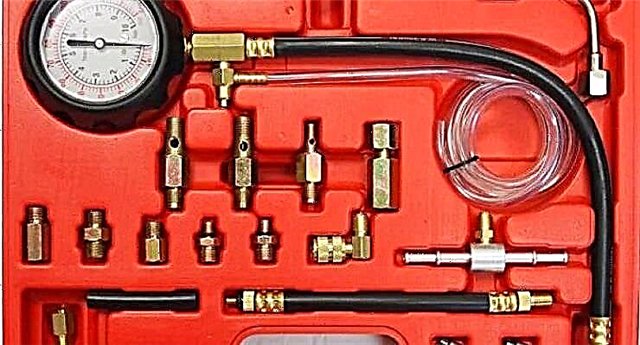
- Vacuum pump;
- manometric manifold.

Note. If work is being done in the process of repairing the apartment, then add to this list a grinder with a circle on concrete. It is useful for performing hidden laying of highways in the grooves of the walls (colloquially - gates).
Specialists in refrigeration machines involved in the installation of HVAC equipment will immediately ask: where is the set for cutting and flaring copper pipes with a scraper for stripping (example)? The answer is simple: a beginner for a one-time installation of a split system with a capacity of up to 3 kW, these devices are not needed. It’s easier to buy a ready-made installation kit, which includes all the necessary elements:
- 2 copper tubes of custom length with a diameter of 6.35 mm (¼ ”) and 9.52 mm (3/8”) with correctly flared ends and put on nuts;
- K-Flex rubber insulation (already stretched over the trunk);
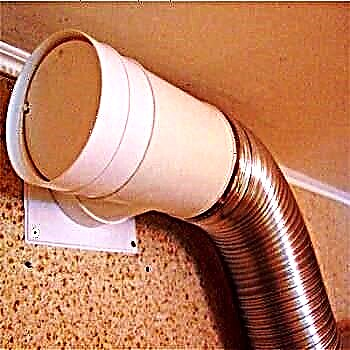
- corrugated hose for drainage;
- electric cable for 4 or 5 cores with a cross section of 1.5 mm²;
- bracket for mounting the outdoor unit.

Why is it better to use a kit to install an air conditioner in an apartment. Firstly, its price is comparable to the cost of milling equipment and materials purchased separately. Secondly, the ends of the lines are cut on the machine, and not manually, which contributes to a reliable connection. Poor manual flaring is the mistake of most inexperienced craftsmen, leading to freon leaks and compressor failure.

Note. Depending on the conditions for laying communications, you will have to buy a plastic cable channel, PVC winding tape, mounting foam and a visor.
On economic feasibility
For a correct comparison, we will take as a basis the cost of installing a household split system with a capacity of up to 3.5 kW (7000–9000 BTU). This includes the installation and connection of the outdoor and indoor units with a tourniquet (2 lines, cable and drain) up to 5 m long through the wall. The price includes all related materials listed above.
In Moscow, the installation of low-power home air conditioners costs from 5,500 to 8,000 rubles, which is 98-143 dollars in dollar terms. e.In other cities of the Federation, the cost may differ in a smaller direction, but the proportions are still preserved. Now we list the average Moscow prices for the purchase of materials and rental equipment for hand-made installation:
- Makita punch - about 500 rubles. per day;
- a two-stage pump for evacuation together with a manometric manifold - 700 rubles per day;
- installation kit with communications 5 m long - 2500 rubles.

For reference. When renting equipment, it is often required to pay a deposit in the amount of 4-8 thousand rubles in relation to the indicated units. Those who want to roll copper pipelines on their own can rent tool kits of 300-500 p. per day.
Adding the indicated amounts, we get 3700 rubles. or 66 y. If you add here 10% for the purchase of consumables and unforeseen costs, you will get about 4,000 rubles (71 cu). This means that the installation of an air conditioner, made by hand, saves from 1500 to 4000 rubles. As a rule, the lowest price threshold announced on the Internet does not correspond to reality, since it does not include part of the work and you will have to pay extra for them.
Hence the conclusion: the on-site installation of split systems is economically viable and allows you to save 2500–3500 rubles on low-power units. or 45-62 y. One condition: the work needs to be done efficiently, otherwise the cost of remodeling or repair will make you remember the proverb about how many times the avaricious pays.

Note. Prices in rubles are taken for the period March - April 2017 and may vary depending on the exchange rate and seasonality.
How to install a cooler - instructions
The split system is mounted in several stages:
- Identify where to hang the outdoor and indoor units. Mark the route for laying the harness with communications.
- Drill through the wall and lay the trunk. Fasten the indoor unit and connect the freon tubes, wiring, and drain to it.
- Put the outdoor unit, connect all communications to it.
- Perform commissioning.
It is important to observe just such a sequence of operations. You can not first mount the base plate of the indoor module, and then drill a hole for the harness, because during drilling you can stumble on the fittings, which will cause the tool to go sideways or up. In the first case, the route will look clumsy, and in the second you will not meet the requirements for the slope of the pipelines and the plate will have to be rearranged higher.

Immediately give recommendations on the proper placement of units and the device of the track:
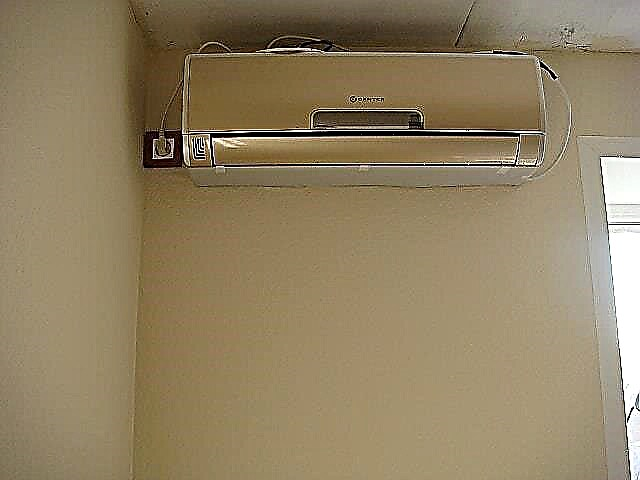
- The indoor unit of the air conditioner must be hung in such a way that the air flow does not directly blow you, otherwise a cold is provided. The optimal location is right on the outside wall or on the side wall near the window.
- The minimum distance from the ceiling to the climate unit is 100 mm, but it is better to step back 30 cm. A minimum clearance of 125 mm is needed between the body and the side wall, so that there is enough space for the curtains.
- The outdoor unit must be installed so that it can be serviced safely at a height. The most convenient place is on the wall within an unglazed loggia or balcony. If they are absent, the unit must be placed under the window so that the master can reach the service ports and all the details of the device - compressor, heat exchanger, and so on.
- The distance from building structures to the back wall of the outdoor module is 20 cm, to the sidewall - 300 mm, as shown in the diagram.
- According to the rules, highways are laid with a bias towards the street. There should be no stagnant sections along the way in the form of loops facing up or down.

Tip. Putting the outdoor module on the wall to the side of the window is wrong. Although you can reach the service ports, it will not work to disassemble the unit without completely dismantling it. The master, who arrived to repair the compressor, has every right to refuse to perform work of increased danger (at height).
Mount the indoor unit
First of all, we advise you to unpack the product, get the instruction manual and carefully study it. The fact is that the diagram given in the technical passport accurately shows how to correctly install and connect the split system of this particular model. Remove the wall plate from the housing immediately. Further the procedure is as follows:
- Drill through the outer wall so that the channel goes with a slope towards the street. The optimum hole diameter is 50 mm. It is very advisable to put a special plastic sleeve in it.
- Unpack the installation kit and immediately wrap the ends of the freon tubes so that dust and moisture do not get into them. Connect the second ends to the communications embedded in a niche on the back wall of the room module.
- Strip the ends of the power cable, lead it through the back opening of the case and connect it to the terminals by sketching a small diagram on paper in order to remember the colors.
- Form a harness from the mains and cable, as shown in the diagram below, and then carefully wrap with PVC tape. Do not twist the piping together!
- Now precisely place the block mounting plate and fix it to the partition with dowels, strictly observing the horizontal.
- Together with the assistant, insert the tourniquet into the hole, while simultaneously installing the internal module on the plate (it is fixed on the latches).

What you need to know for the successful installation and connection of communications indoors. First, when twisting the refrigerant lines, rotate the union nut, holding the counterpart with a wrench, and not vice versa, as is done in the photo. Otherwise, "turn your head" to the factory tube and it will have to be soldered. Also, do not tighten the nut with great force, so as not to squeeze out the rolling, which will subsequently cause freon leakage.

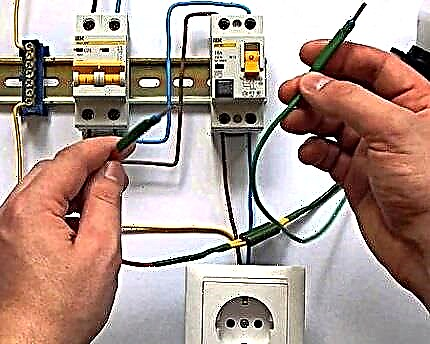
The second nuance: fasten the plate clearly in level, the built-in condensate bath is already made with the desired slope. And the last: do not plug the power cable into a power outlet; it looks ugly. Hiddenly lead a separate line with your machine from the switchboard.
Since the article a priori cannot contain all the details, otherwise it risks becoming a story, we recommend that you watch the installation video shot by an experienced master:
We put the outdoor module
When installing the outdoor air conditioning unit in the apartment, it is important to be careful and protect yourself with insurance. Ask an assistant to hold you by the belt while you are busy with fasteners, or use safety equipment. The installation technology is simple and looks like this:
- Using the construction level, mark the drilling points on the wall and make holes for the anchors.
- Insert the mounting bolts of the outdoor unit heads down into the brackets, calculating its position on the site. Secure them with special plastic washers so that they do not fall out.
- Install the brackets, securing them with anchors. Place the external module on them, aligning the holes with the bolts. Using a combination wrench with extension cord, loosen the fastening nuts and tighten them.
- Lead to the communication unit - screw the tubes to the ports, and connect the cable to the terminals.
Tip. Do not rush to immediately mount the visor, it will prevent you from working with service ports during the startup process. How to install the external part of the split system is shown in the video:
The final step is to launch the system.
All new air conditioners from the factory are charged with freon contained in the outdoor unit. Your task is to fill the entire circuit and start the split system without loss. The procedure is as follows:
- Connect the extreme hose of the pressure gauge manifold to the service port spool on the gas side (a larger diameter pipe is suitable for it). Connect the middle hose to the vacuum pump. In this case, all cranes must be closed.
- Turn on the pump unit and open the manifold valves.During the first 10-20 seconds of operation, bleed air through the fitting provided on the pump.
- Evacuate the system for at least 20 minutes if the length of the route does not exceed 5 m. The goal is to completely remove moisture from the circuit and pump out the air, as the pressure gauge on the manifold will inform you (it will show pressure minus 1 Bar).
- After half an hour, close the valve and stop the evacuation, then wait at least 20 minutes, watching the gauge needle. If it starts to rise to zero, then your system is leaky and needs to be reworked.
- Unscrew the service port valve on the liquid side and then on the gas side with a hex wrench, thereby filling the circuit with refrigerant.
- Turn on the air conditioner and check its operation. When the pressure in the system rises, quickly unscrew the hose from the manifold and install all plugs.

Attention! If you use an adapter for R410 freon to connect pressure gauges to the port, unscrew the nut of the adapter itself, and not the hose, to disconnect! Otherwise, all freon will go into the atmosphere.
At the end, let the air conditioner run in all modes and make sure that the condensate flows from the drainage, and not elsewhere (for example, along the wall under the indoor module). You can get more information about installing a street block and starting a split by watching the last video:
Suppose you accidentally released factory refrigerant into the atmosphere or the gas escaped through a poor-quality connection. Eliminate the cause of the leak, buy freon in a cylinder and refill the air conditioner using our recommendations.
In the end - tips for beginners
It is unnecessary to write hackneyed phrases about the difficulty of installing the air conditioner on your own, this is clear from the foregoing. For a better understanding, we recommend that you carefully review the videos from various masters, and also read the comments left under these videos on YouTube. Intelligent installers are often unsubscribed there, and from them you can gather a lot of useful information.
Last moment - do not try to save on the tool. If the hammer can be taken from a neighbor, then you are unlikely to find a vacuum pump for free, but you cannot work without it. Although some unfortunate installers do without evacuation, squeezing the air out of the circuit with freon. But moisture remains, and then it disables the compressor.