In order for the water supply systems and the circuits along which the coolant circulates to perfectly perform their own duties, their components must be correctly assembled and correctly connected. The result of the efforts of plumbers should be tight so as not to create problems for the owners and their neighbors. Do you agree?
All relevant pipe connection methods that ensure the normal operation of the system are given in our article. We have described in detail the technological options depending on the material from which the articulated parts are made and on the category of the pipeline. Our tips will help you achieve the perfect result.
Overview of plumbing fittings
All known methods of connecting pipes can be attributed to two classes - detachable and one-piece. In turn, detachable connections are flange and coupling. One-piece methods include compounds such as socket, collet, butt welding, glue.
Connections, which, if necessary, can be disassembled and then returned to their place, greatly simplify maintenance and repair of pipelines. These compounds are used mainly in the formation of internal communications.
The advantage of the method is its simplicity in execution. No chemical or thermal effects are used here. A malfunction of the pipeline connected by this method is easy to identify and eliminate.
A tight fit during the plumbing connection of pipes is ensured by the use of special parts. There are 2 types of joints related to the detachable type: flange and fitting. The first is used when it is necessary to joint large-diameter pipes, and the second are more suitable for home pipelines.
The varieties, characteristics and labeling of polypropylene pipes and fittings used in the connection will be introduced by the next article, which we recommend reading.
Fittings used in plumbing systems are installed at control points, on bends, branches. They are cast and compression. In terms of functionality, the following types of fittings can be distinguished:

To help a novice plumber this scheme. It will facilitate the selection of fittings that meet the specific conditions encountered in the construction of the pipeline
A set of fittings is selected depending on the specifics of a particular pipeline. According to the method of attaching them to the pipe, fittings are clamped, threaded, pressed, threaded, used for welding and soldering.
Fittings for metal-plastic pipes are produced, they are used in the formation of crimp and press joints. Fittings are used for joining polypropylene pipes, which are used both in gluing and welding. For copper pipes, fittings are made for both press connections and soldering.
The process of assembling a metal-plastic pipeline using compression fittings will present the following selection of photos:
Image Gallery
Photo from
Compression fittings for assembling metal-plastic pipelines should be selected according to a pre-compiled diagram. Corner, socket and other connectors must be the same company as the pipes
Place the connector for installation directly on the object. Two marks must be left on the pipe: the end of the fitting and the depth of immersion of the pipe into it
By marking the depth of immersion of the pipe in the fitting, we perform cutting. In cutting, we use a pipe cutter designed specifically for plastic pipes
If branches with hot and cold water are located nearby, we put on a warming corrugation on the hot line. It eliminates condensation
The ends of the pipes to be joined are calibrated before connection to remove bumps and bevel 1 mm
We install a union nut on the pipe with a split split ring so that the ring is inside the joint
To make connections, we use two keys. One hold the pipes from turning, the second we tighten the nut without excessive force
Installation of angular, cross, tees and ordinary fittings is carried out in the same sequence. After assembling the pipeline, its tightness is checked by supplying water to the pipes
Step 1: Choosing fittings to make connections
Step 2: Marking the Connector Installation Location
Step 3: Pipe Cutting
Step 4: Installing a Thermal Insulation Corrugation
Step 5: Calibrate the pipe before connecting
Step 6: Installing the union nut
Step 7: Make a Compression Connection
Step 8: Assembling a pipeline of any complexity
Bell-shaped method of connection
A socket is a mounting extension designed to create a reliable connection. The principle is based on the fact that the end of a pipe having a smaller cross section is inserted into a pipe of a larger diameter. Seal the connection by using a sealant placed in the socket or by gluing with a composition resistant to water.

A connection of this type is used in the installation of gravity pipelines for both internal and external sewage systems, pressurized outdoor water pipes and sewer networks
Depending on the pipe material and their diameter, one of several existing options for a bell joint is chosen: with a sealing ring, without a ring, welding, gluing.
O-ring joint
Without an o-ring, cast iron pipes are most often connected. The inserted pipe is shortened, the end face is processed so that there are no nicks and mother-in-law in it. In the socket insert the tail of the articulated pipe.
The resulting gap is filled with a rope of oiled hemp or flax tarred strands. First, the sealant is laid in a ring and choked in the socket, tapping with a hammer on a special wooden spatula or screwdriver. It is important to ensure that the ends of the material do not fall into the pipeline.
Continue layering the seal until the socket is filled to 2/3 of its depth. For the last layer, an untreated sealant is used, because oil or resin will deteriorate adhesion when filling the remaining space in the socket with cement.
To obtain a solution, cement of grades 300 - 400 and water for its dilution are needed. The components are taken in a ratio of 9: 1. Cement is tamped in a bell and covered with a wet rag for better setting.

The best quality seal is the use of expanding cement. It is prepared before use by adding to the container with the main component of water in a ratio of 2: 1 with further thorough mixing and pouring into the socket. Upon hardening, the cement self-compacts and becomes completely waterproof
Sometimes, instead of cement, an asbestos-cement mixture made from M400 cement and high-quality asbestos fiber in a ratio of 2: 1 is used.
Water is added immediately before installation in an amount of about 11% by weight of the dry mixture. Instead of cement-based gaskets, bituminous, silicone sealants, clay are used, the last layer of which is strengthened by applying bitumen or oil paint.
Bell joint with O-ring
This method is most often used when building an intra-house sewer system. A rubber ring sandwiched between the bell and the pipe inserted into it gives a tight connection. Therefore, the method is not only simple, but also reliable.
The sealing ring to some extent smoothes out the differences between the axles between the two pipes to be connected. However, this is only if the axes on each meter of the composite pipeline are offset by an amount that does not go beyond the pipe wall thickness.
If this condition is violated, then the likelihood of leaks as a result of uneven deformation of the seal increases.

The procedure for connecting pipes to the bell. The joined parts clear of dirt and dust. In order not to damage the o-ring during installation, the smooth end of the pipe is pre-lubricated with soap, glycerin or special silicone grease. Oils cannot be used for this purpose. In addition to lubrication, it will protect the ring from damage by a chamfer made on the connecting end of a pipe of a smaller diameter at an angle of 15 °
To determine the depth of compression of the free shank of the pipe into the socket, the sealing ring is temporarily removed. Then, having placed the pipe in the socket to the stop, mark the place where the inserted part is in contact with the socket.
During installation, the pipe is slightly extended in relation to the mark - by 0.9 - 1.1 cm. This distance will make it possible to balance the internal stresses that appear in the system during temperature fluctuations.
Before placing the ring, it is recommended to dip it in soapy water and squeeze a little. This will greatly simplify its insertion into the socket recess. In order to minimize distortion, some manufacturers began to produce fittings with an angle of 87 ° instead of 90 °. The pipe enters the socket at a slope and the ring does not warp.
If there is a need to connect pipes made from materials of various kinds, transition pipes are used. A nozzle size such as the inner diameter should correspond to the outer section of the connected pipe. In the case of articulation of the socket of the polymer pipe with a pipe made of cast iron, a double sealant is applied to the end of the second and the pipe is mounted.
Bonding plastic pipe parts
By gluing, they connect the PVC pipe to the bell. For better adhesion, the socket inside and the tail of the inserted pipe are treated with emery so that the surface becomes rough. Then the chamfer is removed, the treated parts are degreased using methylene chloride as a primer.
Before making the connection, check the pipes for compatibility. A pipe of a smaller diameter should enter the socket freely, but not too much. Then the line marks the border for applying glue - this will help to join the parts without errors.
On the surface of the connected elements - 2 thirds of the socket recess, as well as the fully calibrated end of the pipe, apply glue evenly with a thin layer. The pipe is inserted into the socket and rotated a quarter of a turn to improve contact between the connected elements. The joined parts are held until the glue sets.

For bonding pipes made of polyvinyl chloride, special aggressive adhesive compounds are used. The process is similar to welding, but without high-temperature effects, it is replaced by a chemical reaction, which results in the dissolution of the surfaces of the connected parts of the pipes and their transformation into one by copolymerization
The process takes only 20-30 seconds. If a uniform layer of glue appears at the junction, it is immediately removed with a piece of clean cloth. From gluing to complete stabilization of the joint and testing the pipeline for leaks, a minimum of one day must pass.
Image Gallery
Photo from
Pipes intended for gluing PVC are produced with sockets that allow for a socket connection. They produce fittings that are connected to the pipes in the same socket method
The surfaces that will be in contact with each other are first treated with sandpaper, then degreased with methylene chloride, which dissolves the polymer, only then glue is applied
Glue, most often this is the composition of GIPK-127, is applied with a thin even layer on the entire connected surface of the pipe and 2/3 of the surface of the socket or fitting
All connection actions should take no more than 3 minutes. We quickly connect the parts, turn them around the axis 1/4 turn and return them to their place. If gluing is carried out normally, then along the edge of the coupling / socket, a thin roller of the adhesive composition should protrude
PVC pipes for bonding
Pipe processing before joining
Rules for applying glue to PVC parts
Joining glued parts
To repair existing pipelines, fittings are used in the form of repair couplings or products with an elongated socket. The pipe section is cut out, the chamfers are removed at the ends, and special glue is applied to the ends. The sleeve is put on the bottom of the pipeline.
A sleeve with a long socket is put on the top of the pipeline until it stops, if necessary, a shaped part is mounted on it. Move the sleeve together with the fitting down until it fits into the bottom of the pipe. The sliding sleeve is moved upward so that it covers the joint area.

A repair coupling differs from a conventional coupling in that it does not have a flange inside, so during the repair process you can move a socket of any pipe through it
If even after this a leak is observed, the joint is filled with silicone sealant. The bottom and top are determined depending on the direction of movement of the transported substance.
Using resistance welding
To apply this method of connecting pipes, you must have a welding machine. It can be mechanical or manual, but always equipped with a special tool that heats the elements to the required temperature.
When using bell-shaped technology in the connection of pipes, a xiphoid-shaped device is used. It is a set made of metal and consisting of a sleeve designed to heat the outer surface of the pipe and the mandrel (pin), fusing the part from the inside.
Image Gallery
Photo from
Pipe preparation for welding
Pipe marking to prepare for welding
Degreasing unreinforced pipes
Cutting reinforced PP pipes
Cleaning the outer polymer layer with a shaver
Removing aluminum foil foil
Warming up the connected parts with a soldering iron
Pipe and fitting welding process
An important point is the selection of the kit. Its parameters should correspond to the diameter of the assembly.
The technology of socket connection of pipes using resistance welding is simple:
- A restrictive clamp is put on the inserted pipe. The distance between the edge of the pipe and the clamp should equal the depth of the socket plus another 2 mm. The difference between the diameter of the clamp inside and the outer diameter of the jointed pipe should be 0.2 mm.
- The kit is heated, pre-installed on the device.
- Put the bell on the mandrel, and the smooth tail of the pipe on the sleeve until it stops.
- Perform heating for the set time.
- Remove the parts from the kit at the same time and connect them, keeping the parts from displacement until the melted material hardens.
Welds are inspected to identify possible distortions, voids, uneven seams.
On the outer surface of the parts there should be no defects that appear in case of exceeding the permissible temperature. Visually, the outside of the weld should be in the form of a symmetrical roller having the same width and distributed evenly around the perimeter of the pipe.

A set of sleeve-mandrel is selected individually for different diameters. The surface of the heating element is coated with a special composition, otherwise molten material will stick to it
The maximum height of the roller on a pipe with a wall thickness of up to 1 cm is a maximum of 2.5 mm. For pipes in which this size exceeds 1 cm, a roller height of 3-4 mm is considered acceptable. The edges of the welded joint can be offset relative to each other by no more than 10% of the pipe wall thickness.
The technology for welding PP pipes is given in detail here. We recommend that you familiarize yourself with the content of our article.
It is recommended to weld pipes of polymer pipes with a diameter of more than 50 mm and a wall thickness of more than 4 mm on a stationary or mobile device with a disk heating element:
Image Gallery
Photo from
Soldering iron for plastic pipes with discs
Cross-cutting of connected parts
The process of heating pipes on a disk soldering iron
A set of discs in the configuration of the device
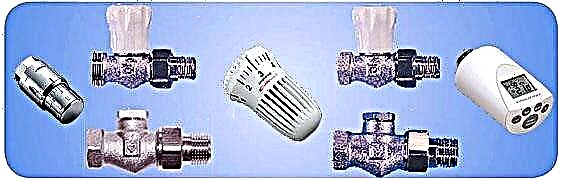
Clamp fitting
The concept of a collet connection of pipes means the use of a clamping or collet fitting. With its help, it becomes possible to implement a variant of a collapsible joint of pipeline elements made of unequal materials. Features of its implementation are described here. The clamping fitting is selected based on the type and diameter of the pipe.
The docking algorithm for plastic pipes is as follows:
- The hole of the desired pipe segment is calibrated using a calibrator and the inner chamfer is removed using the chamfer.
- Disassemble the fitting by twisting the nuts from the ends and removing the round seals from the fittings.
- Put the union nut on the end of the pipe, then the fitting collet.
- Insert the shank of the fitting into the pipe, applying force so that it fully engages.
- Manually tighten the nut on the fitting body.
- Repeat the same manipulations with the second pipe, then join the connected parts and tighten the union nut without twisting 1-2 turns.
Tighten the nut carefully so as not to damage the pipe. In the process, the clamping ring is deformed, due to which the end of the pipe and the side of the fitting cartridge are tightly pressed against each other.

This type of joint is optimal for small diameter pipes. The detachable connection is compact, it takes very little time to assemble it, and the joint is very durable
Experienced plumbers recommend that when tightening the tightening nut, the first turns are performed manually, and then use a ring wrench.
Collet connections are mainly used in the assembly of copper pipelines:
Image Gallery
Photo from
Collet joints in the assembly of inter-pipelines belong to the conditionally split category. They are used where soldering is impossible or dangerous.
Despite the fact that the assembly of pipes is carried out without soldering, collet fittings allow you to create an absolutely tight connection
By construction, the crimp press fitting for copper pipes is very similar to a conventional capillary solder connector. The difference is that instead of solder, a seal is located inside
In the assembly of copper circuits of heating and water supply systems using crimp fittings, mainly solid pipe sorts are used. However, connectors are also suitable for soft
It is strictly forbidden to use fittings for steel products in the connection of copper pipes. Only brass or copper parts are suitable
Compression of the connection is carried out by press pliers designed for this particular mounting operation
The assortment offered to plumbers now has all kinds of collet connectors, using which they produce linear, angular, tee and cross connections, as well as put shut-off and control valves on the pipeline
The collet connection belongs to the category of semi-detachable. If pipes do not flow in its area, it is better not to change it and not touch it at all. If a leak is detected, just pull it up
Copper pipe assembly
Section collet connection
Fittings for collet connections
Solid Pipe Copper Piping
Use of copper or brass fittings
Crimp tool
Installation of fittings on a copper pipeline
Crimp connection
Threaded Formation
A thread is called a spiral or helical surface by which a threaded connection is made. The use of threaded pipe joints in plumbing systems is a classic installation method.
It is used where it is possible to periodically monitor the joints, because thread tends to weaken under the influence of various factors.

To connect the elements using thread, simply twist two parts having suitable sections. They are also disconnected simply by untwisting.
There are different types of pipe threads. Each of them is characterized by such parameters as the profile of the surface on which the thread is applied, direction, location, number of thread starts.
The list of the most popular types of pipe threads includes:
- cylindrical or whitward;
- conical;
- round;
- Npsm
The first of them is denoted by the letter G, has 2 accuracy classes. The profile visually resembles an isosceles triangle. At the top - an angle equal to 55⁰. Pieces of pipeline with a diameter of up to 6 inches are connected with inch threads, to which special requirements for tightness are imposed. With a larger diameter value, welding is used.
An inch-type conical thread is used for conical joints and for creating joints of a conical thread made on the outside and cylindrical inside the pipe. The letter R marks the external thread, internal - Rc, LH - directed to the left. The thread plus sealant acts as a sealant.
To connect often dismantled plumbing fixtures: water shut-off valves, faucets, mainly use round thread. Designate it with the symbols of Kr.
The table summarizes the main parameters of the thread for a pipe that you can cut yourself. An important value for an inch thread is its pitch. This is the distance between adjacent ridges or depressions. Its value along the entire length remains unchanged, otherwise the thread will be inoperative
The NPSM thread profile has the appearance of a triangle and an angle of 60 °. The size range in inches is from 1/16 to 24. This thread of the American standard is a kind of cylindrical thread. It differs from domestic only in profile angle size.
The author talks about the nuances and problems that arise when connecting pipes during the installation of sewers:
The author of this video shares the method of solving his problem:
Properly connecting the pipes is very important. Articulation has always been the weakest point in the pipeline. If it is executed with errors, then, as a result, leaks, blockages, and sometimes pipe ruptures will occur.
Therefore, before proceeding with the independent installation of plumbing communications, you need to study all the existing connection methods. If the matter seems complicated, you can always turn to plumbers.
Tell us about your own experience gained during the assembly of plumbing systems. It is possible that you know the nuances of editing and forming connections that will be useful to site visitors. Please write comments in the block below, post photos with the steps of the process, ask questions.