Any waste that is for an ordinary person just a garbage that needs to be disposed of in the hands of a master can bring tangible material benefits.
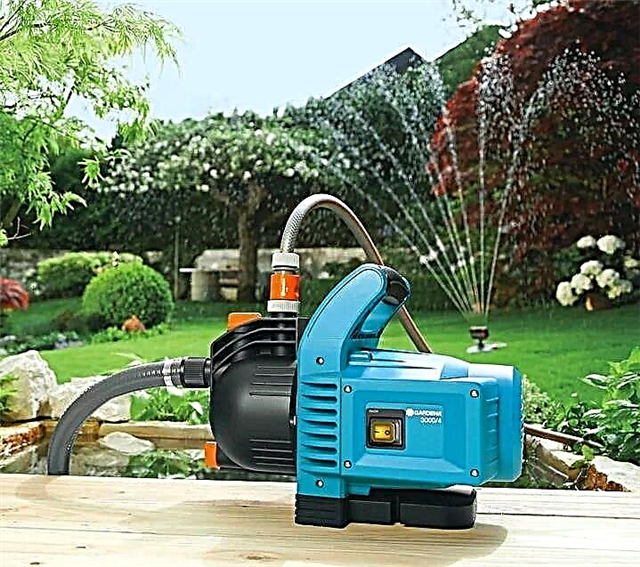
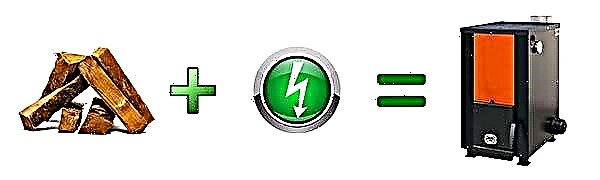
For example, scraps of pipes of various sizes, an old gas cylinder and other metal scraps will turn into a furnace, and used oil into fuel. It’s not so difficult to arrange heating with used oil yourself.
We will tell you about the main options for the installation of heating systems on the "waste" type of fuel. In our article, we describe in detail methods for the manufacture of proven practical home-made devices. Based on our recommendations, you can achieve the best result.
General principle of operation
If we want to get high-quality heating on the basis of working out, the oil cannot just be taken and set on fire, because it will chad and stink. In order not to experience these unpleasant and hazardous side effects, you need to heat the fuel so that it begins to evaporate.
Volatiles resulting from heating will burn. This is the main principle of the heating unit at work.
Image Gallery
Photo from
Improvised heater
Turbocharged homemade model
Connecting the module to a regular potbelly stove
Miniature Coffee Maker
Use perforated tube
To implement this principle, two chambers are provided in the design of the stove, which are connected to each other by a pipe with holes. Fuel enters the lower chamber through the filler opening, which is also heated here. The volatiles formed in this process rise up the pipe, being saturated through perforation with atmospheric oxygen.

The schematic diagram of a two-chamber stove with a connecting perforated pipe allows us to understand how a simple unit operates at work
The resulting combustible mixture ignites already in the pipe, and its complete combustion occurs in the upper afterburner, separated from the chimney by a special partition. If the process technology is properly observed, soot and smoke during combustion are practically not formed. But the heat will be enough to heat the room.
Using a plasma cup
For the sake of achieving maximum process efficiency, you can go the more complex way. Recall that our goal is to isolate volatile constituents from fuel by heating it. For this, a metal bowl should be placed in a single chamber of the unit, which must not only be heated, but heated.
Working through a special dispenser from the fuel tank, a thin stream or drops will enter the chamber. Once on the surface of the bowl, the liquid will instantly evaporate, and the resulting gas will burn.

The efficiency of such a model is higher, since the fuel supplied by the drip burns better, and the problem of its topping up during the operation of the furnace disappears by itself
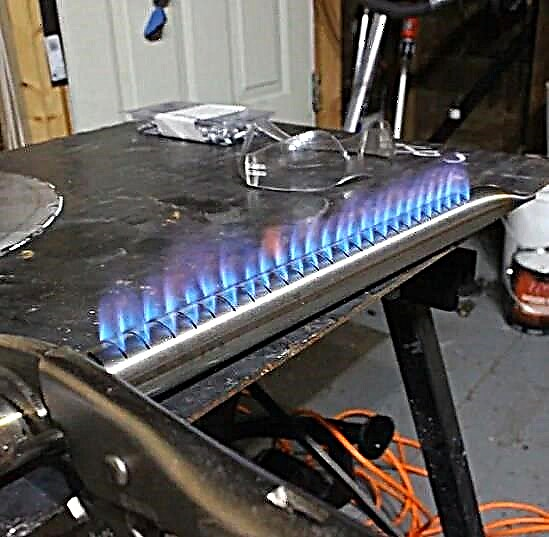
If everything is done correctly, the combustion of gases should be accompanied by a bluish-white flame. A similar flame can be observed during burning of the plasma, therefore, a red-hot bowl is often called a plasma. And the technology itself is called drip feed: after all, the fuel with it should come in exclusively small doses.
With all the variety of designs, the operation of all heating units using waste fuel is based on the principle described above.
Balance of advantages and disadvantages
It would seem that the idea is practically devoid of flaws, but this is not so. In order to make an informed decision about the use of such heating in your home, you need to see not only the pros from its use, but also the cons.
Let's start with the merits of the method. So, if you have regular access to waste fuel, which is essentially spent, then you can effectively use and dispose of this material at the same time. Proper application of the technology allows you to get heat with complete combustion of the material without emission of harmful substances into the atmosphere.
Other advantages include:
- uncomplicated design of the heating unit;
- low fuel and equipment costs;
- the possibility of using any oil that is on the farm: vegetable, organic, synthetic;
- combustible material can be used even if contaminants make up a tenth of its volume;
- high efficiency.
The disadvantages of the method should be taken seriously. If the process technology is not followed, incomplete combustion of the fuel may occur. His couples are dangerous to others.

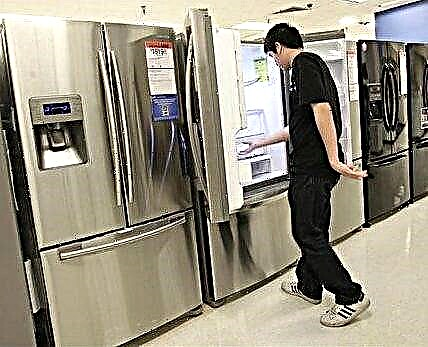
If there were more shortcomings in heating at work than advantages, then such factory-made products that would be sold like hot cakes would not appear on sale, despite fairly high prices
It is not for nothing that the main requirement for the arrangement of heating for working off is the presence of ventilation in the room where the boiler will be operated.
We list other disadvantages:
- since good draft requires a high-quality chimney, it must be straight, and its length should be from five meters;
- the chimney and plasma cup should be regularly and thoroughly cleaned;
- the complexity of the drip technology lies in the problematic ignition: at the time of fuel supply, the bowl should already be hot;
- operation of the boiler causes air drying and oxygen burnout;
- independent creation and use of hot-water structures can contribute to lowering the temperature in the combustion zone, which jeopardizes the efficiency of the process as a whole.
To solve the last of the above problems, you can mount a water jacket where it can not affect the quality of combustion - in the chimney. These shortcomings have led to the fact that the product without significant modifications is practically not used for heating residential premises.
If there is no desire or time to build the unit with your own hands, you can take advantage of the numerous offers from workshops involved in the production and installation of metal structures of different scales:
Image Gallery
Photo from
In-line furnace
Model with a large heat exchanger
Waste oil tank
Initial fuel tank
Where to apply and how to refine?
Due to the substantial list of disadvantages, oil heaters are rarely used in housing. Their use is possible only in utility rooms and in the case of a fail-safe supply and exhaust ventilation. But they are widely used for warming up technical and production facilities.
Motorists use them precisely as heaters for garages, and then in the case of a device for a good hood. Gardeners are installed in greenhouses, livestock farmers - in farm buildings. In car washes, in service stations, in warehouses where there are no combustible materials, they will always find a place.

If the operation of the boiler at workout for heating residential premises is a matter of concern, then in a garage, service station and car washes this model is always in demand
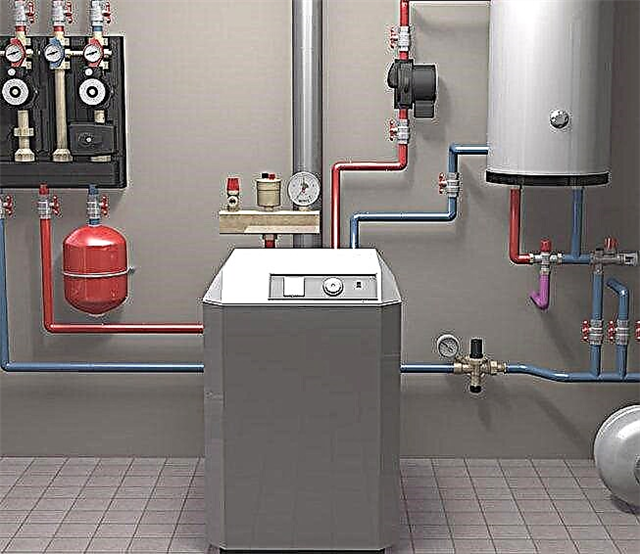
Often, basic designs undergo various modifications. For example, a water jacket or hot water coils are used for these purposes. Such equipment is included in water heating. Furnaces of this kind must work with the use of automation, otherwise their functioning will have to be vigilantly monitored.
Image Gallery
Photo from
Waste oil heater model
Installation of automation for process control
Design features of the model
Installing a water tank for heating
A few successful homemade products
Using the basic design principle, you can always come up with a product that will best meet your own needs. We will try to offer you some options worthy not only of attention, but also of embodiment.
Option # 1 - with ready-made housing
This design may appeal to such a craftsman who has already mastered welding skills. Its essence lies in the use as a body of a finished product - an oxygen or gas cylinder, pipe or barrel with thick walls.
To visually imagine the process of converting billets into a kiln at the end of mining, carefully consider the diagram below.
The product uses a plasma thicket and, therefore, drip feed technology. It is capable of producing approximately 15 kW of heat, which will heat up to 150 m2 area.
You should not try to modernize this model, pursuing the goal of increasing its productivity by increasing the air flow or by changing the size of the combustion chamber. This can lead to an increase in the volume of soot and offspring, which is unsafe.

During the combustion process, mining greatly heats the walls of the boiler body, as a result of which thin-walled products can simply burn out and turn out to be fire hazard
To begin with, we need to build the basis of the model - its body. To do this, we need a pipe with a height of 780 mm, a diameter of 210 mm and with thick walls (at least 10 mm). The bottom of the body is cut out of a steel sheet (at least 5 mm). The diameter of the bottom circle is 219 mm. It remains only to weld the bottom to one side of the body.
The legs that you have to weld to the bottom can be made of durable bolts. To track the combustion process inside the pipe and to be able to start heating the bowl, you need to make a viewing window in the body 70 mm from the bottom level. To do this, a hole of such a size should be cut in the case that it is functional - convenient for the user himself.
The cut out part of the pipe will go into the manufacture of the opening door. You just need to weld a neat bead to it and lay an asbestos cord around its perimeter so that the door hermetically seals the hole. We fix the door to the case with bolts.
For the chimney, you need a pipe with a diameter of 108 mm with thick walls (4 mm). It should be welded to the body on the side opposite to the one where the viewing window has been cut. From the top, retreat 7-10 cm.
To make a lid, a round blank with a diameter of 228 mm is cut out of sheet metal (5 mm thick). A flange should be welded along the edge of the workpiece. For this, a metal strip 3 mm thick and 40 mm wide is needed. In the resulting lid on the side, we make another viewing hole with a diameter of 18 mm. Its door will play the role of a safety valve.
In the center of the lid we cut another hole with a diameter of 89 mm. A pipe for air supply will be inserted into it, which we make from a workpiece 76 cm long, 89 mm in diameter, and 3 mm wall thickness.
Perforated blank. To do this, we retreat 5 cm from the edge and drill 9 holes 5 mm in diameter in a circle. After 5 cm, two more rows of holes need to be made - 8 in a row, diameter 4.2 mm. After another 5 cm, we make the fourth row of holes - 9 pieces, diameter 3 mm.
To do the next job, we need a grinder. Along the edge of the pipe, from which we retreated 5 cm, we cut cracks 3 cm high, 1.6 mm thick. The circumference of such slots should be 9 pieces.
From the opposite end of the pipe 5-7 mm from the edge, cut a hole 10 mm in diameter. A pipe for supplying fuel with a diameter of 10 mm and walls of 1 mm thick will be inserted into it. As can be seen from the diagram, it enters the air pipe and ends simultaneously with it. The length of this fuel line and its bending angle depend on the location of the oil tank.
The pipe for supplying fuel and air assembly is welded to the cap. When installed in the product’s case, it should not rest against the bottom, and not reach 12 cm to it.
We proceed to the manufacture of the plasma cup. To do this, you need a thick-walled pipe (4 mm thick) with a diameter of 133 mm. We cut a piece of 3 cm from it. From a steel sheet with a thickness of 2 mm, cut a round billet with a diameter of 219 mm. The workpiece is welded to the segment and we get the bowl.
Actually, the stove is almost ready. It remains to collect it. To do this, we place a bowl inside the case 7 cm from the bottom. Now it should be clearly visible from the viewing window located below. From the window the cup is set on fire. We put on the cover provided for it with devices for supplying air and oil.
The chimney, which will be connected to the corresponding pipe, is made of a pipe 4 mm thick and 114 mm in diameter. The length of the chimney must be at least 4 meters. Its peculiarity can be considered exclusively vertical arrangement. There should not be any inclined sections! The outer part of the chimney should be insulated.

This working furnace was not made according to the scheme that we presented above, but its basis is also made up of a used gas cylinder
When an oil tank is installed, you can check the operation of the unit. To do this, put paper moistened with fuel in a bowl, and then set it on fire. At the final stage of burning paper, you can begin to feed processing. The circuit of this device is not in vain given so similarly. We want you to get a high-quality device that will delight its creator with uninterrupted and safe operation for a long time.
The stages of the construction of a waste oil boiler are described in detail in the next article. We recommend that you familiarize yourself with the technology of making homemade products, which will find application in the country and country economy.
Option # 2 - the most popular
This model is really popular with owners of cottages and garages. Make it easy. It consists of two compartments (cameras). Fuel is poured into the lower one, which will be heated to form volatile gases. When they pass through a perforated pipe located between the compartments, the gases are saturated with oxygen and ignite.
When a mixture of gases is burned in the upper compartment, the temperature can reach 800 degrees. Such heating requires an active air supply. For this, an inspection hole is provided in the lower compartment, through which, in addition, fuel is poured. To use it to regulate the air supply, a damper is required.

All sizes of this most popular garage model of a working stove are shown in the diagram, but if it’s easier for you to make square cameras, use the parameters specified in the video that we posted at the end of the article
When gases pass from the bottom of the structure to the top, the mixture is saturated with oxygen through small openings (10 mm in diameter) in the pipe.
To perform the work should prepare:
- a grinder with cutting and stripping discs; The minimum disc diameter is 125 mm.
- hammer drill with a drill of at least 13 mm;
- welding machine (from 200 amperes) and a protective mask or glasses;
- sledgehammer;
- hammer, chisel and pliers;
- corner for legs;
- sheet steel;
- carrying;
- rivets.
From the sheet iron, the lower compartment is cut out and cooked. An observation window is cut out in it, through which fuel and air will enter inside. The valve for this hole is fixed on the compartment body with a rivet.

During the assembly and welding of the product, it is necessary to carefully check all seams for quality, because this model heats up very much during its operation
A perforated connecting gas pipeline-pipe is welded to the lower chamber, to which the upper compartment with a removable cover is connected by welding. It is also cut out of sheet steel and welded. During welding, the joints should be carefully checked for gaps.

The finished two-chamber furnace looks very simple, but its efficiency does not raise any doubts: it has already shown itself and repeatedly
To give the structure better stability, metal corners are used. The chimney must be connected to the pipe strictly vertically. You can check the operation of the finished stove at work by pouring oil into the lower compartment. There they set it on fire using plain paper for this purpose.
The following photo gallery will familiarize with one of the options for working off the stove, popular among motorists and garage owners. In order to understand the design features, we attached a drawing with the dimensions of the homemade product.

Mining stoves warm much better than electric heaters. Moreover, their operating costs are generally zero
According to the design dimensions, the master, who built this model of the stove, ordered the cutting of metal in the workshop. A turner drilled holes in the pipe. He just needed to assemble the parts, connecting them with welds:
Image Gallery
Photo from
In order to avoid misunderstandings during the assembly of the stove parts into a single design, we check the presence of all components, measure the dimensions
We weld the sides to the base of the lower chamber. At first, we simply outline by laying dotted seams along the edges so that in case of an error it would be possible to disassemble
To the chamber assembled by spot welding, we apply its cover with an opening for installing a perforated pipe. It should completely overlap this capacity.
After making sure that nothing needs to be fixed, or by correcting the design, if necessary, weld all the parts with a continuous convex seam
Following the algorithm described earlier, we collect the upper chamber. It must be divided into two parts by a partition
First, we connect the components of the upper chamber with a discontinuous seam so that defects can be corrected
We weld the inner partition of the upper chamber to the metal square sheet with an intermittent seam
We weld narrow sides to the top panel, which will close the camera
Step 1: Checking the size of the chopped parts
Step 2: Welding the beads to the lower chamber
Step 3: Trying on the top cover of the bottom camera
Step 4: Weld the Continuous Seam Chamber
Step 5: making the upper chamber
Step 6: Weld the joints with an intermittent seam
Step 7: Pulling the partition to the base
Step 8: Connect the narrow sides to the top
Having completed the assembly of parts of the upper and lower chambers, we proceed to connect the modules of the stove into a single whole:
Image Gallery
Photo from
Four supports welded to the base of the lower chamber, chopped from a profile pipe or corner
We install pipes on the lid, which will be used to close the lower chamber. We weld it first with point seams. After verifying the vertical position, we lay a continuous seam
We cut a hole in the cover of the lower chamber through which the stove will be filled with used oil
We check how well welds are made. If necessary, correct the situation
We put the base of the upper chamber, to which narrow sides are welded onto the perforated pipe
To ensure structural rigidity, we weld metal extensions from a bar, corner or a narrow profile. They connect the upper and lower chambers
We fix on the upper chamber the pipe to which the chimney pipe will be connected. We build a cover for the hole in the lower chamber, designed for fueling
We choose a suitable place for installing the stove, we beat the tin sheet to the floor. We install home-made products on it, we cover them with bricks that increase thermal conductivity. The chimney is connected to the pipe
Step 9: Fixing the Feet to the Base of the Lower Chamber
Step 10: Installing the Perforated Pipe
Step 11: Cutting the oil fill hole
Step 12: Weld Quality Check
Step 13: Installing the Base of the Upper Chamber
Step 14: Welding Metal Stretch Marks
Step 15: Installing the Chimney Pipe
Step 15: Finishing work before the firebox
The process of working a similar, but slightly modified stove can be seen in the video in the final part of this article.
Option # 3 - small but distant
For large rooms you need the productive stoves from the previous options. But there are also baby units that can do a lot too. This homemade product weighs only 10 kg.
At a flow rate of 0.5 liters of fuel per hour, it is capable of producing up to 6 kW of heat. You can unleash it even stronger, but you should not do this for safety reasons: it will explode. A great option for garage heating.
If you have an old gas cylinder, then it can become the fuel tank for this homemade product. The oil tank is collected from the top and bottom of this bottle. It is recommended that you keep a circular seam with a sealing ring, which will further increase the strength of the product.

On the left side is a furnace with all the parameters that will be useful to you during its manufacturing, and on the right, the finished product becomes the main part of water heating
If there is no gas cylinder, then any other container with a height of 350 mm and a diameter of 200 to 400 mm is suitable. From it, a tank for burning fuel will be welded.
To create an air-fuel mixture, we use a pipe whose walls are at least 4 mm thick. The cone can be welded from strong steel, from 4 mm thick. The diagram shows all the dimensions of the structure. They can be adjusted both smaller and larger, but not more than 2 cm.
Particular attention should be paid to the seams at the points of transition to the cones: this is where maximum heating can occur due to the active burning of the gas mixture.
The chimney for this stove is made with a length of not more than 3.5 meters, so that when creating too active draft the fuel is not drawn into the pipe. Such stretching can not only increase fuel consumption, but also reduce its heat transfer.
This homemade product can be used in hot water heating. To do this, as shown in the right diagram, a steel tube is wound around the fuel afterburning zone, through which water will pass.
To prevent a significant decrease in gas temperature, the coil is closed with a steel casing that reflects heat. Water heated in this way goes into the heating system.
You can also use a gas cylinder successfully in the manufacture of a stove for a garage. The technology of its assembly is described in detail in our proposed article.
Safety precautions
For the safe operation of improvised heating during mining, special attention must be paid to the quality of the oil. It should not contain substances that can easily ignite - gasoline, acetone and others.
The quality of automobile waste, as a rule, leaves much to be desired. When used, carbon deposits may form, which will have to be cleaned from time to time.

You see how hot the boiler can be, for which used oil is used as fuel: you can’t dry your socks near it, put a kettle with water or lay dry boards
In addition, the following safety precautions should be observed.
- The diameter of the chimney should not be less than 10 cm. A sandwich chimney is preferable: less soot is deposited on its surface.
- Flammable substances, including the fuel tank, cannot be near the boiler. Only at a safe distance.
- Avoid getting water or any other liquid in the chamber with hot oil. The consequences of such a leak are presented in the video in the final part of this article.
- During the operation of the boiler with waste oil, the heating temperatures are significantly higher than those achieved by the combustion of solid fuel. Therefore, for this design and choose thick-walled materials.
- It is advisable to equip the boiler room with a forced air circulation system.
Do not leave a running machine unattended. This is an effective but rather dangerous thing.
Master craftsmen do not make secrets from their own achievements and are always ready to share achievements, show home-made work. Pay attention to the video, which presents the same furnace as in option # 2, but with some modifications.
See how it works, what is the result of its use in conditions of external frost to heat a fairly spacious garage.
Once again, we draw your attention to the safety precautions that should be followed when using improvised stoves for mining.
The waste fuel that you can get, if not completely for nothing, then for mere pennies, always attracts the attention of the rugged owners of garage workshops, greenhouses or other non-residential premises that require heating.
Yes, talented people can literally do the waste they need in the household. But skill does not come from outside: it is being developed. Perhaps our information will help not only those who already know how, but also those who want to learn how to do everything with their own hands.
Want to share your own experience in the construction of a heating device for development? Do you have information that will be useful to site visitors who want to make a garage stove with their own hands? Please write comments in the block below, post a photo on the topic, ask questions.